Connection to an IceGrid Registry
8 min read
8 min read
8 min read
8 min read
8 min read
8 min read
8 min read
8 min read
8 min read
In order to administer or monitor an IceGrid deployment, you need to connect to the IceGrid registry of this deployment. If your IceGrid registry is replicated, you can connect to any replica for monitoring purposes; if you intend to change definitions, for example to describe a new server, you need to connect to the master IceGrid registry. This page describes how to connect to an IceGrid registry.
Connecting Using a Saved Connection
Use File > Login... or press the  button to open the
 Saved Connections dialog:
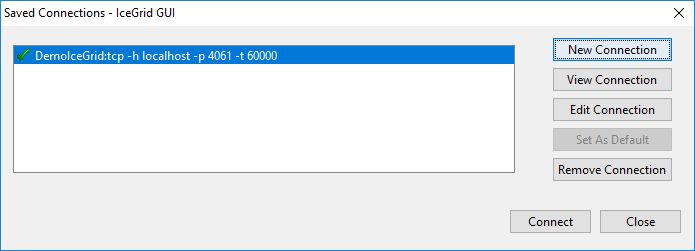
Double-click on the IceGrid registry you want to connect to, or select the IceGrid registry and click on the Connect button.
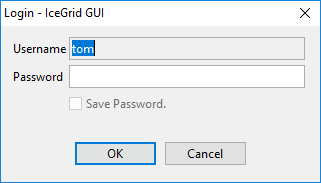
If the connection contains saved credentials, IceGrid GUI will immediately attempt to connect to the selected IceGrid registry with these credentials. Otherwise, it will open a new dialog to request the missing password (two passwords in some cases), such as:
Creating a New Connection
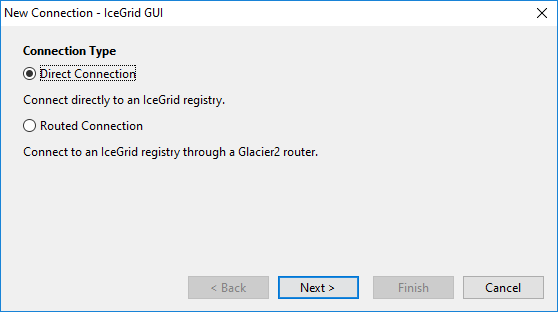
In the Saved Connections dialog, click on New Connection to open the New Connection wizard.
We describe three typical connection scenarios in the sections below.
TCP Connection to a Local IceGrid Registry
Let's create a TCP connection to the IceGrid registry running on localhost.
Step 1: Select Direct Connection:
Step 2: Check the box to connect to the master registry.
If you have several replicas this ensures you will always connect to the master registry.
Step 3: Select Manual Endpoint to manually enter address information:
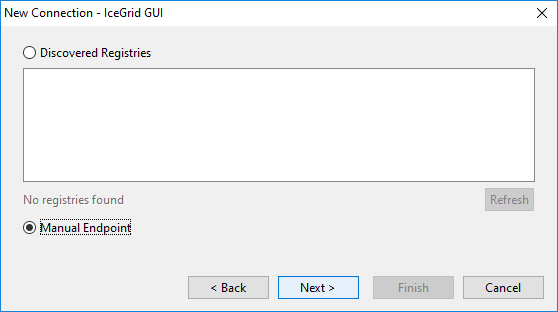
IceGrid GUI can also discover registries using UDP multicast. Any registries it finds will be shown in the list, or click the Refresh button to search again.
Step 4: Select the first option to enter the addressing information as a hostname and port number.
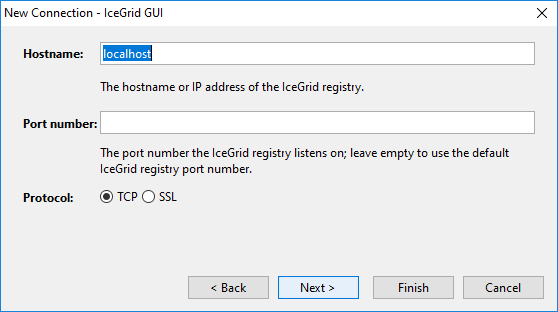
Step 5: Enter localhost for the hostname, leave the port number blank and keep TCP as the protocol:
Step 6: Enter a username and password for this connection:
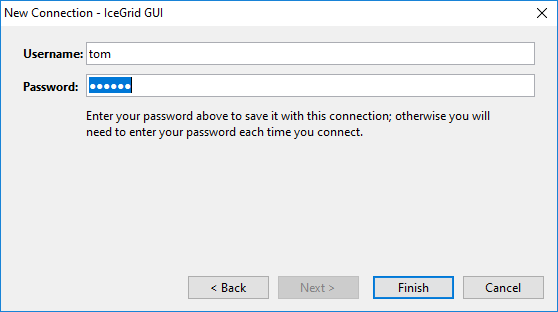
Step 7: Click Finish to save the connection; IceGrid GUI then attempts to connect to the IceGrid registry.
SSL Connection to Local IceGrid Using X.509 Credentials
Now let's create a direct SSL connection to an IceGrid registry and authenticate using our X.509 key (also used for SSL authentication). The target IceGrid registry must be configured to accept SSL connections and authentication using SSL credentials; see IceGrid.Registry.AdminSSLPermissionsVerifier.
Steps 1 to 4 are identical to the simple TCP connection described above.
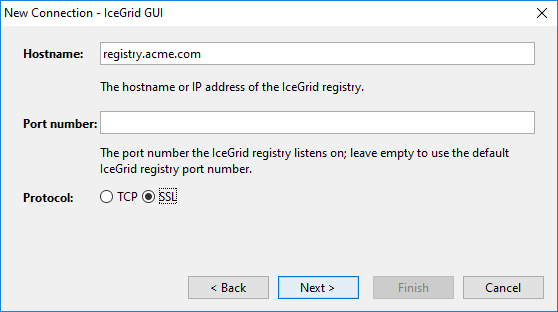
Step 5: Enter the hostname of the IceGrid registry, leave the port number empty to use the default IceGrid port number (4061 for TCP and 4062 for SSL), and select SSL for the protocol:
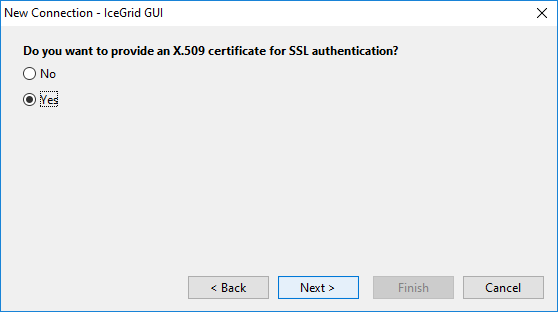
Step 6: Select Yes to provide an X.509 certificate for SSL authentication:
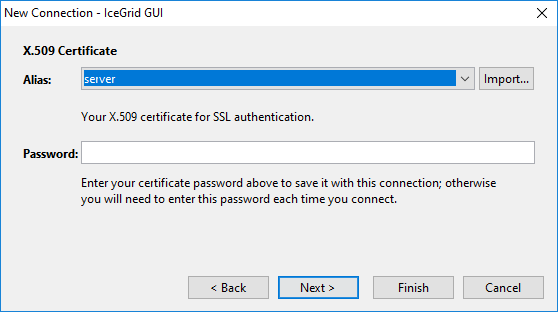
Step 7: Select the X.509 key used for SSL authentication from the Alias drop-down list; this list corresponds to the My Certificates set in the Certificate Manager described in the next section. Click on the Import... button to open the Certificate Manager dialog.
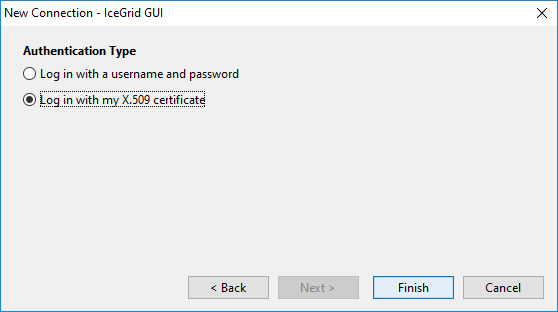
Step 8: Choose to use this X.509 certificate (carried through the SSL connection) to authenticate ourselves with the IceGrid registry:
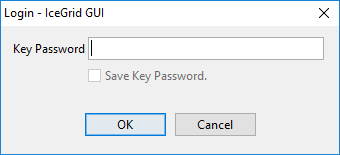
Step 9: Click Finish to save the connection and connect to the IceGrid registry. Unless we entered (and therefore saved) the X.509 key password with the connection, we are prompted for this password:
SSL Connection Through Glacier2 Router
Here we'll connect to an IceGrid registry "behind" a Glacier2 router. In this case, we need to connect to the Glacier2 router and authenticate ourselves with the router. We do not provide any information about the IceGrid registry itself: we will connect to the IceGrid registry identified by the target Glacier2 router configuration. See Glacier2 Integration with IceGrid.
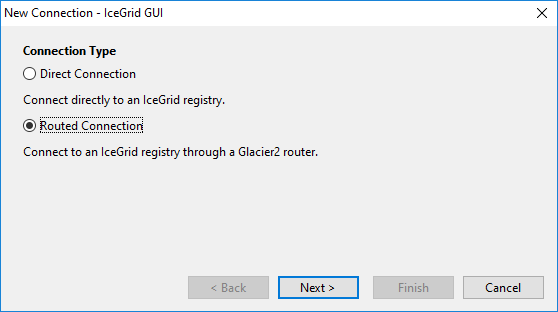
Step 1: Select Routed Connection:
Step 2: Enter the addressing information for the target Glacier2 router as a hostname and port number:
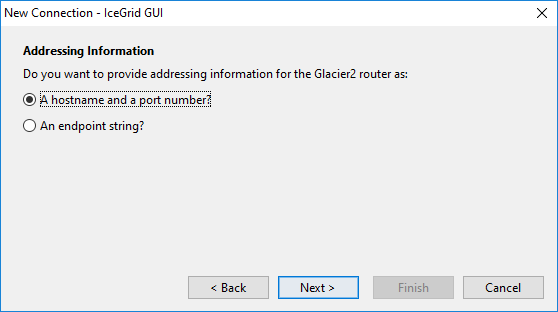
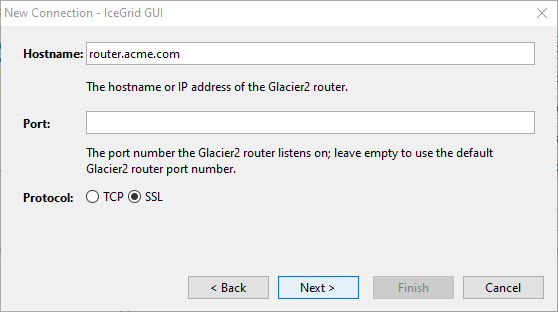
Step 3: Enter the hostname of the Glacier2 router, leave the port number empty to use the default Glacier2 port number (4063 for TCP and 4064 for SSL), and select SSL for the protocol:
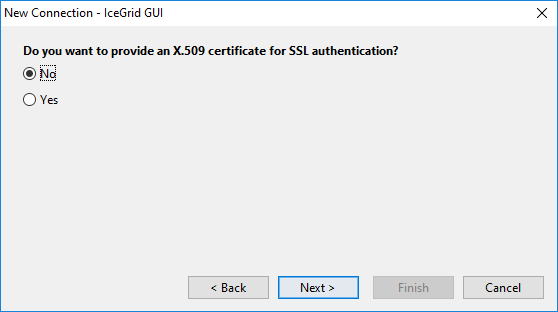
Step 4: Choose not to authenticate ourselves for SSL, so we do not provide a X.509 certificate:
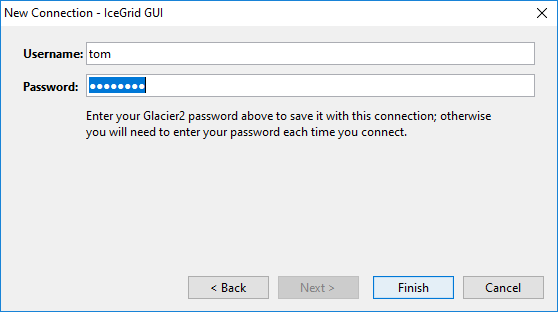
Step 5: Provide a username and password for the connection to the Glacier2 router:
Step 6: Click Finish to save the connection; IceGrid GUI then attempts to connect to the IceGrid registry through the Glacier2 router.
SSL Connections and Certificates
IceGrid GUI maintains a persistent store of X.509 certificates for SSL connections with IceGrid registries. You can import, view and remove these certificates with the Certificate Manager. Use File > Certificate Manager... or click on the Import... button in the Connection wizard to open the Certificate Manager:
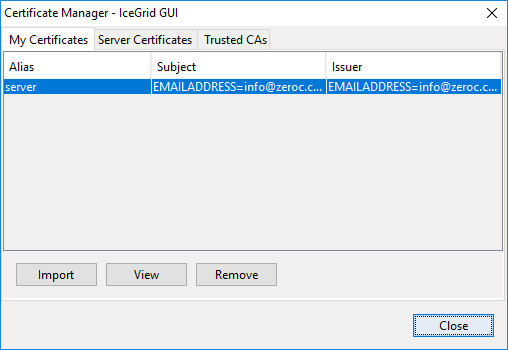
The Certificate Manager maintains three sets of certificates:
- My Certificates These certificates are used to authenticate IceGrid GUI when establishing an SSL connection with an IceGrid registry or Glacier2 router (this first authentication is at the SSL level); once the SSL connection is established, this certificate can also be used to authenticate with the target IceGrid registry or Glacier router (at the application level).
- Server Certificates The certificates of IceGrid registries and Glacier2 routers that IceGrid GUI trusts when establishing an SSL connection. All certificates signed by a Trusted CA (see below) are automatically trusted and usually do not need to be imported in this set.
- Trusted CAs The certificates of Certificate Authorities.
You do not need to import server certificates or CA certificates prior to establishing an SSL connection with an IceGrid registry or Glacier2 router. IceGrid GUI performs the following checks when establishing an SSL connection:
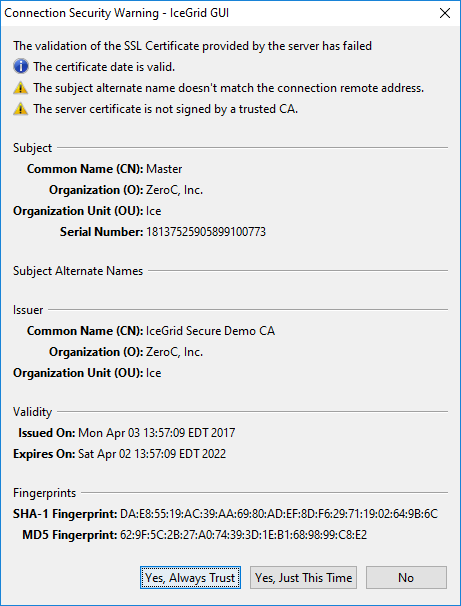
If the X.509 certificate presented by the IceGrid registry or Glacier2 router matches a Server Certificate, proceed
Otherwise, if this certificate is signed by a trusted CA, is valid (now is within the certificate's validity period) and its alternate name is a match for the SSL connection remote address, proceed
Otherwise, display a Connection Security Warning dialog similar to the dialog below to let you decide whether or not to proceed with this certificate:
If you select
Yes, Always Trust, the certificate is added in the persistent Server Certificates set.
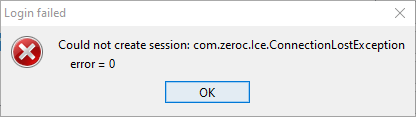
A "client" X.509 certificate (saved in My Certificates) is only necessary when the target IceGrid registry or Glacier2 router requires one. This depends on the setting of the IceSSL.VerifyPeer property in those servers: when IceSSL.VerifyPeer is 2, IceGrid GUI must provide a valid certificate. If you forget to provide a certificate, or provide an invalid certificate, the connection establishment will fail and you will get an error dialog such as:
Editing a Saved Connection
In the Saved Connections dialog, click on Edit Connection to edit a connection. This opens the Connection wizard for your saved connection. With this wizard, IceGrid GUI does not attempt to connect to the target IceGrid registry when you click on the Finish button.
Closing a Connection
Use File > Logout or press the  button to disconnect from an IceGrid registry. This clears all information in the Live Deployment pane.